Context
A client reached out to me a little while ago to ask if it was possible to recover access to a VM that one of his clients use. This Ubuntu 22.04 based VM runs on our OpenStack cloud, powered by QEMU/KVM.
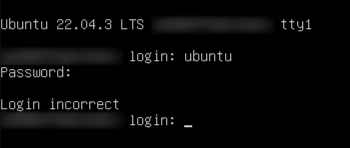
The client’s client had made some modifications to /etc/ssh/sshd_config and subsequently locked themselves out of the machine. It’s important to note here that cloud instances (VMs) typically don’t include a default password set and rely solely on key-pair authentication via SSH. I did the normal thing of sending the client the documentation we have on self-servicing password resets/recovery to Ubuntu which makes use of the good-old hold left SHIFT during a reboot to get to GRUB functionality. However, the client informed me that this wasn’t working.
As this was a weekend, I didn’t have a lot of time to dig into the root cause of the standard boot menu pop-up functionality, but I did want to solve the client’s issue. As such, I went about providing access via another method.
Process
Identify the Host and Stop the Instance
The client provided me with the VM name, and it’s really easy to identify the hypervisor that it’s running on in OpenStack:
| |
This provides me with a table listing the details nicely:
| |
Now I can stop the instance and SSH into the hypervisor. This is a simple openstack server stop <vm_name>, but if you’re not using OpenStack you can SSH into the hypervisor and use virsh stop <vm_domain_id>.
Mount the Guest Filesystem
Once on the specific hypervisor and with the instance stopped, the guests filesystem needs to be mounted. This allows chroot-ing into the guest, where commands such as passwd can be run. This is what I used to provide the client access.
LVM
There are two main ways that we (at my job) currently provide backing images for root disks. The newer method is LVM. With LVM, a qcow2 backing image is first converted to a raw disk, which is then stored in an LV. With OpenStack, the LV is usually given the name of the instance ID with a suffix _disk. So for example, with my LVs stored in the VG nova-vg, running the following command:
| |
Shows me this output:
| |
Now I know where the disk is that I want to target, so I can follow the process below:
Use
fdisk -lto check the partitions on the disk path:1 2 3 4 5 6 7 8 9 10 11 12 13# fdisk -l /dev/nova-vg/xxxxxxxx-xxxx-xxxx-xxxx-xxxxxxxxxxxx_disk Disk /dev/nova-vg/xxxxxxxx-xxxx-xxxx-xxxx-xxxxxxxxxxxx_disk: 6.45 TiB, 7086696038400 bytes, 13841203200 sectors Units: sectors of 1 * 512 = 512 bytes Sector size (logical/physical): 512 bytes / 4096 bytes I/O size (minimum/optimal): 131072 bytes / 131072 bytes Disklabel type: gpt Disk identifier: <disk_identifier> Device Start End Sectors Size Type /dev/nova-vg/xxxxxxxx-xxxx-xxxx-xxxx-xxxxxxxxxxxx_disk1 227328 13841203166 13840975839 6.4T Linux filesystem /dev/nova-vg/xxxxxxxx-xxxx-xxxx-xxxx-xxxxxxxxxxxx_disk14 2048 10239 8192 4M BIOS boot /dev/nova-vg/xxxxxxxx-xxxx-xxxx-xxxx-xxxxxxxxxxxx_disk15 10240 227327 217088 106M EFI System
From this output, it’s clear that _disk1 would be the root partition, where the root filesystem is kept. Now to mount it to the host.
Using
kpartx, the partitions contained within this LV can be exposed or hidden from the host. Since/dev/nova-vg/xxxxxxxx-xxxx-xxxx-xxxx-xxxxxxxxxxxx_diskis a link to/dev/mapper/nova--vg-xxxxxxxx-xxxx-xxxx-xxxx-xxxxxxxxxxxx_disk, I can run the following:1kpartx -a /dev/mapper/nova--vg-xxxxxxxx-xxxx-xxxx-xxxx-xxxxxxxxxxxx_diskWhat results is the partitions being made available to the host for access:
1 2 3 4# ls -l /dev/mapper /dev/mapper/nova--vg-xxxxxxxx-xxxx-xxxx-xxxx-xxxxxxxxxxxx_disk1 /dev/mapper/nova--vg-xxxxxxxx-xxxx-xxxx-xxxx-xxxxxxxxxxxx_disk14 /dev/mapper/nova--vg-xxxxxxxx-xxxx-xxxx-xxxx-xxxxxxxxxxxx_disk15Now that the partitions are exposed, I simply mount the partition containing the guests root filesystem:
1mount /dev/mapper/nova--vg-xxxxxxxx-xxxx-xxxx-xxxx-xxxxxxxxxxxx_disk1 /mntThis provides me with full access to the guest FS:
1
2
3
# ls /mnt bin dev home lost+found mnt proc run snap swap.img tmp var boot etc lib media opt root sbin srv sys usrChanging the password is now easy, as all there is to do is
chrootto the FS and run the usual password setting command:1 2chroot /mnt passwd ubuntuWith that done, the FS needs to be unmounted and the partitions can be hidden from the host once again.
1 2umount /mnt kpartx -d /dev/mapper/nova--vg-xxxxxxxx-xxxx-xxxx-xxxx-xxxxxxxxxxxx_disk
QCOW2 Files
The older method that we’re transitioning away from is to use .qcow2 images stored on the local hypervisor NVMe for guest root disks. Modifying the guest filesystem in this manner requires some tooling on the hypervisor. For this, you need to get qemu-utils, or whatever equivalent package for your distribution that provides the tool qemu-nbd.
With that installed, the process is very similar to that of the LV method:
Load the
nbdkernel driver:1modprobe nbd max_part=8Connect the target
.qcow2file as a network block device (nbd):1qemu-nbd <path_to_file>.qcow2 -c /dev/nbd0Determine the partition table of the device with
fdisk:1 2 3 4 5 6 7 8 9 10 11 12 13# fdisk -l /dev/nbd0 Disk /dev/nbd0: 25 GiB, 26843545600 bytes, 52428800 sectors Units: sectors of 1 * 512 = 512 bytes Sector size (logical/physical): 512 bytes / 512 bytes I/O size (minimum/optimal): 512 bytes / 512 bytes Disklabel type: gpt Disk identifier: CBE49959-A98D-4B4D-BDB1-5684481D4CE2 Device Start End Sectors Size Type /dev/nbd0p1 2048 2203647 2201600 1G EFI System /dev/nbd0p2 2203648 6397951 4194304 2G Linux filesystem /dev/nbd0p3 6397952 52426751 46028800 21.9G Linux filesystemMount the appropriate partition containing the root FS (p3 in this case):
1mount /dev/nbd0p3 /mntchrootinto the FS and change the password:1 2chroot /mnt passwd ubuntuWith that done, the FS needs to be unmounted and nbd needs to be disconnected. The nbd module can also be optionally unloaded now.
1 2 3umount /mnt qemu-nbd -d /dev/nbd0 rmmod nbd
The process is now complete. All that’s left is to start the instance with openstack server start <vm_name> or virsh start <domain_id>.
Caveats
Of course, you should only every do this with explicit client approval and knowledge as I’m sure they would not appreciate it if you’re accessing their data without their consent. That would lead to a pretty bad experience for them.
You also may not be able to do this if you provide images with full disk encryption.